State Machines & NavMesh
A state machine is a behavioral model. It has a finite amount of states that all do something different. State machines can streamline the process of behaviors in your game. In our project, we used state machines for two different behaviors, our towers and our enemies. Each of the topics have very different states but work the same when looking at the state machine.
What is a State Machine?
A state machine will respond to different situations or events by transitioning through various states. It’s like describing the behavior of something based on its current “state” and the input it receives.
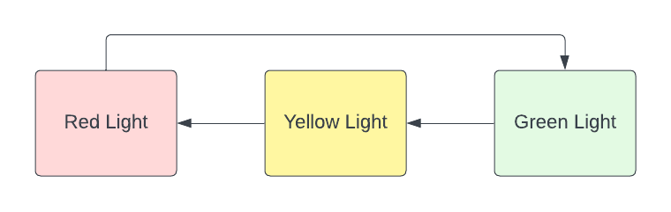
One way to think of it in a real world scenario is a traffic light. If we were to think of a traffic light as a state machine then it would have 3 total states: red light, green light, and yellow light. Each of the states, or lights, do different things and can transition between each other based on conditions.
Red light: The light will only turn red after the light is already yellow. Red means that you need to stop.
Green light: The light only turns green after the light is already red. When the light is green that means you can go.
Yellow light: The light only turns yellow when the light is already green. When the light is yellow it means that it is transitioning to a red light.

How it Works
Now that we understand the theory behind state machines, let's put it into practice! Imagine this scenario: you walk up to a crosswalk and the street you want to cross has a green light. You press the button to cross the street and the traffic light transitions to being yellow from beginning green. Now that the light is yellow, it will transition to being red after a set amount of time.
In summary, a state machine is like a set of rules and instructions for how something behaves based on its current state, events, or inputs it receives.
Now that we understand the theory of state machines let’s talk about how they work in a program or game. States machines need 3 things to work: States, Events, and Transitions.
States: States represent different modes or conditions that your program can be in. For example in a game you might have different menu states such as “playing” or “game over”.
Events: Events are occurrences or triggers that cause the state machine to transition from one state to another. This can be triggered through a myriad of ways such as user input, system events, or anything that can influence the program’s behavior.
Transitions: Transitions define how the state machine moves from one state to another in response to an event. They are rules and conditions that determine which state you will move to based on the event.
Here’s an example in pseudo code:


First you want to make a class and constructor. For this example we will be using the traffic light example from above. For our different states we will start by creating a string called “state”. This string will determine which state we are currently in. In our constructor we can set our initial state to whatever we want. For this example we’ll start at a red light.


Next we’ll need a function to process our input. Getting our input is separate from this function but can be connected very easily. In our example we check for which state you are in and based on that the state machine will do something different. You can add as many states as you want.
How Can We Use This Technique?
State machines are simple but very effective. They are not tied down to one genre of game. They can be applied to almost any game you can think of and serve a purpose. For our project state machines were used for basic enemy and tower behavior. A state machine can be used for something very complex such as a boss fight, or something simple such as a traffic light.
How We Used It in Our Project
Like I said before, we used state machines for our enemy and tower behaviors. The way we programmed it is different from the example because we needed to take in collisions and triggers in unity, but the core technique still stayed the same. Here’s the base state code that all the other states inherited off of:


As you can see it is very similar to the example above but using unity syntax. For this state machine it has the functionality of a regular class such as start (enter state), update, and the collision functions.
For our in-game functionality the state machine will have our enemy change states when it enters the range of a tower and moves to its attacking state. The enemy uses NavMesh for its pathfinding to find the objective then switches to its moving state to get to the target. In the moving state update function it will update the path if any new objects are placed in the scene. When the enemy stops moving it means it has switched to the attacking state.
What is a NavMesh?
NavMesh, short for Navigation Mesh, data structure for AI applications used to help agents in pathfinding through spaces. A NavMesh will help developers create paths for agents that can avoid obstacles in their environment. The spaces can range from simple to complex and NavMesh will still work. For this project we utilized the built-in unity feature to assist with our enemy pathfinding.
How It Works
To understand how a NavMesh works, you first need to understand the theory behind it. To get an agent to move from one place to another you need two things: A map of the environment, and a path to your destination. If you want to make your path to your desired destination then you need a path, and if you want your path to your destination then you need your map. These two things cannot work without the other.
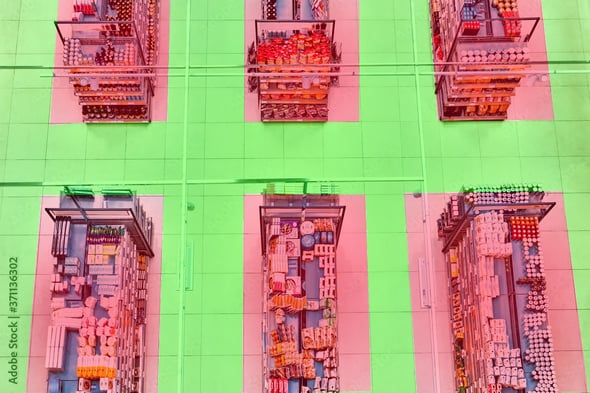
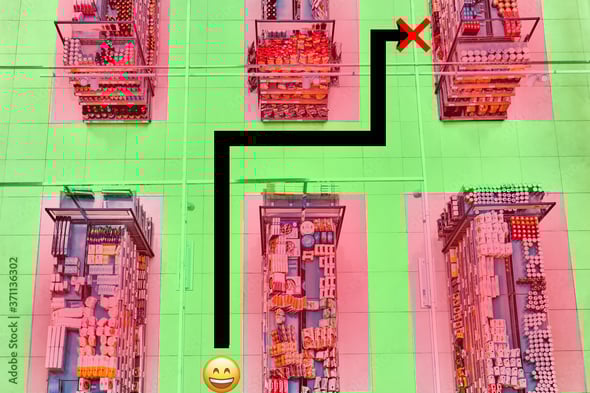
Let’s use an example to better understand how we could utilize a NavMesh. Imagine you are playing a game that takes place in a grocery store. Your agent wants to get a certain item at the back of the store. Without the NavMesh the agent would wander around the store randomly while bumping into things, walking into walls, and maybe getting stuck. With a NavMesh it will know its surroundings and walk straight to the item. Finding where your item is includes the two things from before, let’s break them up into two steps: Making the map and finding the path.
Let’s use this image to represent our grocery store without a NavMesh:


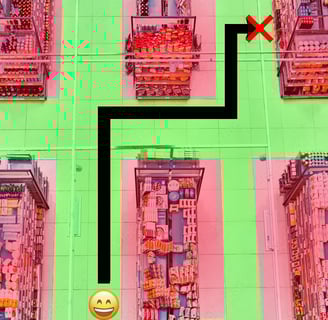
Let’s say that each tile on the ground represents a space the agent can move to. Without determining which tiles can and can’t be walked on, the agent will eventually walk into a shelf. Now if we implement our NavMesh our agent will see the store like this:
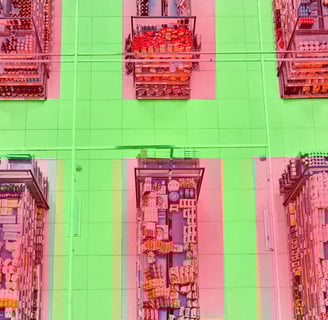
Now our agent can see where it can and can’t walk. This technique is applied in the same way in Unity.
Now that we have our map we need to find a path. A NavMesh is really only the technique to create the map, so you can use any search algorithm you want to find your path. Unity uses the A* method to find a path so we’ll also use that.
Before we find our path we need to know what the A* algorithm is. A* is a searching algorithm that will find the shortest path to your destination. The A* algorithm uses a priority queue to take in points around the starting point to find a path, it will repeat this process until it finds the destination. The A* algorithm is a loop so it will continue until it finds its destination or the whole map has been visited. Once the algorithm finds the desired destination it will go back one tile at a time back to the agent to determine the most optimal path.
Now that we understand both of these techniques separately, we can combine them to create our NavMesh pathfinding.
To get NavMesh working in Unity there are a few steps. First you need to create your terrain in your scene. Next you can create an empty game object and call it NavMesh. Then you will add the “NavMesh Surface” component. This component creates a NavMesh for us.
After you’ve added the NavMesh to your scene you can start to work on the agent. Go to your enemy and add the “NavMesh Agent” component. This component will allow the game object to act as an agent in the NavMesh and use NavMesh function calls. Now in your script you can use the function “SetDestination(position)” to change the destination of your agent. Now when you play the scene your agent will move toward the point you entered for SetDestination.
How Can We Use This Technique?
This technique can be used in many ways but the one that comes to mind is enemies. Having a basic enemy that walks towards a goal can be easily created with a NavMesh. This technique is especially useful when your environment has obstacles that entities cannot move through. This technique can be applied to a myriad of game genres since enemies are in most games. You don’t even need to use it for enemies, you can use it to control your player like in a MOBA.
How We Used It in Our Project
NavMesh was used in tandem with state machines to get our enemies to move towards the objective. The state machine is able to set the enemy agent’s target and rebake the environment. We implemented Unity’s NavMesh system to simplify enemy movement.
Platform Suitability
State machines are not tied down to a single platform. The concept of a state machine can be recreated in every engine and programming language. As long as the program or game calls for it, the developer can use a state machine regardless of the engine or language (you can even create it in Scratch).
NavMesh is also a concept that can be implemented in many places. NavMesh’s use cases are more narrow than state machines since you only use NavMesh for a specific task. NavMeshes can be used on many platforms as long as you are able to recreate the two rules: making a map and finding a path.
Intended Audience
This post can be viewed by anyone who wants to learn about the basics of state machines and NavMeshes. I used basic examples, such as traffic lights and grocery stores, so that anyone can understand the theories behind these advanced topics. I want this blog post to be accessible to everyone with a small amount of prior knowledge of game development or programming. This would ideally be something a student like me would look at for guidance on understanding the topics.
Genres
State machines can be used in a wider variety of games since its application is so broad. State machines can be implemented into basically any genre because of its versatility but here are some examples: An action adventure game boss fight switching attack patterns, tower defense game where the towers switch modes of attack, and arcade games such as pac man where the ghost change their behaviors.
NavMesh has more limited applications but can still be used in a variety of game genres. The first example that comes to mind is in MOBAs where the minions walk towards the objective. Another example is in a hack in slash where the enemies walk towards the player. Another example is in RTS games where you need to command a large number of agents to move to a point.
This project's goal was to learn a new technique, write an educational blog explaining how it works, how we applied it to our project, and how others can use these techniques in their own games/projects.